How to Groom a Yorkshire Terrier at Home
It's completely normal to feel a bit daunted by the idea of grooming your adorable Yorkshire Terrier at home. Many Yorkie parents worry about nicking their tiny companions, making a mess of their silky coat, or causing undue stress. But I promise you, with the right tools, a little patience, and some guidance, you can absolutely master the art of at-home grooming, saving money on professional salon visits while strengthening the incredible bond you share with your furry friend. This guide is designed to empower you, breaking down every step of the process so you can confidently keep your Yorkie looking and feeling their absolute best, right from the comfort of your own home.
Understanding Your Yorkie's Unique Coat and Why it Matters
Before we even think about picking up a brush or a pair of scissors, it's crucial to understand what makes your Yorkshire Terrier's coat so special. It’s not just "hair"; it's a defining characteristic that dictates how we approach their grooming.
The Silky, Hypoallergenic Truth
One of the most remarkable things about a Yorkie's coat is that it's often described as being more akin to human hair than traditional dog fur. Unlike breeds with a thick undercoat that sheds profusely, Yorkies boast a single layer of fine, silky hair that grows continuously. This unique texture is why they're often touted as "hypoallergenic," as they shed minimally, making them a popular choice for allergy sufferers.
However, this distinction comes with its own set of responsibilities. Because their hair grows long and doesn't shed out like typical fur, it's incredibly prone to tangling and matting. Just imagine if you never brushed your own long hair – it would quickly become a matted mess! The same applies to your Yorkie. This continuous growth and fine texture mean that consistent, diligent care is absolutely essential to prevent painful mats from forming close to their skin, which can lead to discomfort and even skin infections if left unattended. It’s not just about looking good; it’s about their health and comfort.
Common Yorkie Coat Types and Their Challenges
While we generally talk about Yorkies having "silky hair," there can be subtle variations in coat type, and understanding your specific pup's hair can help tailor your grooming approach. Most commonly, you'll encounter two main types, though there's a spectrum in between.
The ideal show-quality Yorkie coat is a true silky, fine, and straight texture that drapes beautifully. This type is generally easier to brush through but can still tangle readily if not maintained daily. Then there's the "cottony" or "woolly" coat, which is softer, often thicker, and has a less defined silkiness. While still charming, this cottony texture is a veritable magnet for tangles and mats. It tends to knot up much faster and requires even more diligent brushing and perhaps a slightly shorter haircut to manage effectively at home.
Factors like genetics play a significant role in determining your Yorkie's coat type. You might notice that even with the best care, some Yorkies simply have a coat that requires more frequent intervention. Diet also influences coat health; a high-quality diet rich in Omega-3 and Omega-6 fatty acids can contribute to a healthier, more manageable coat. Understanding these nuances helps you set realistic expectations for your at-home grooming routine and choose the most effective tools and techniques for your beloved companion.
Gathering Your Essential Grooming Tools
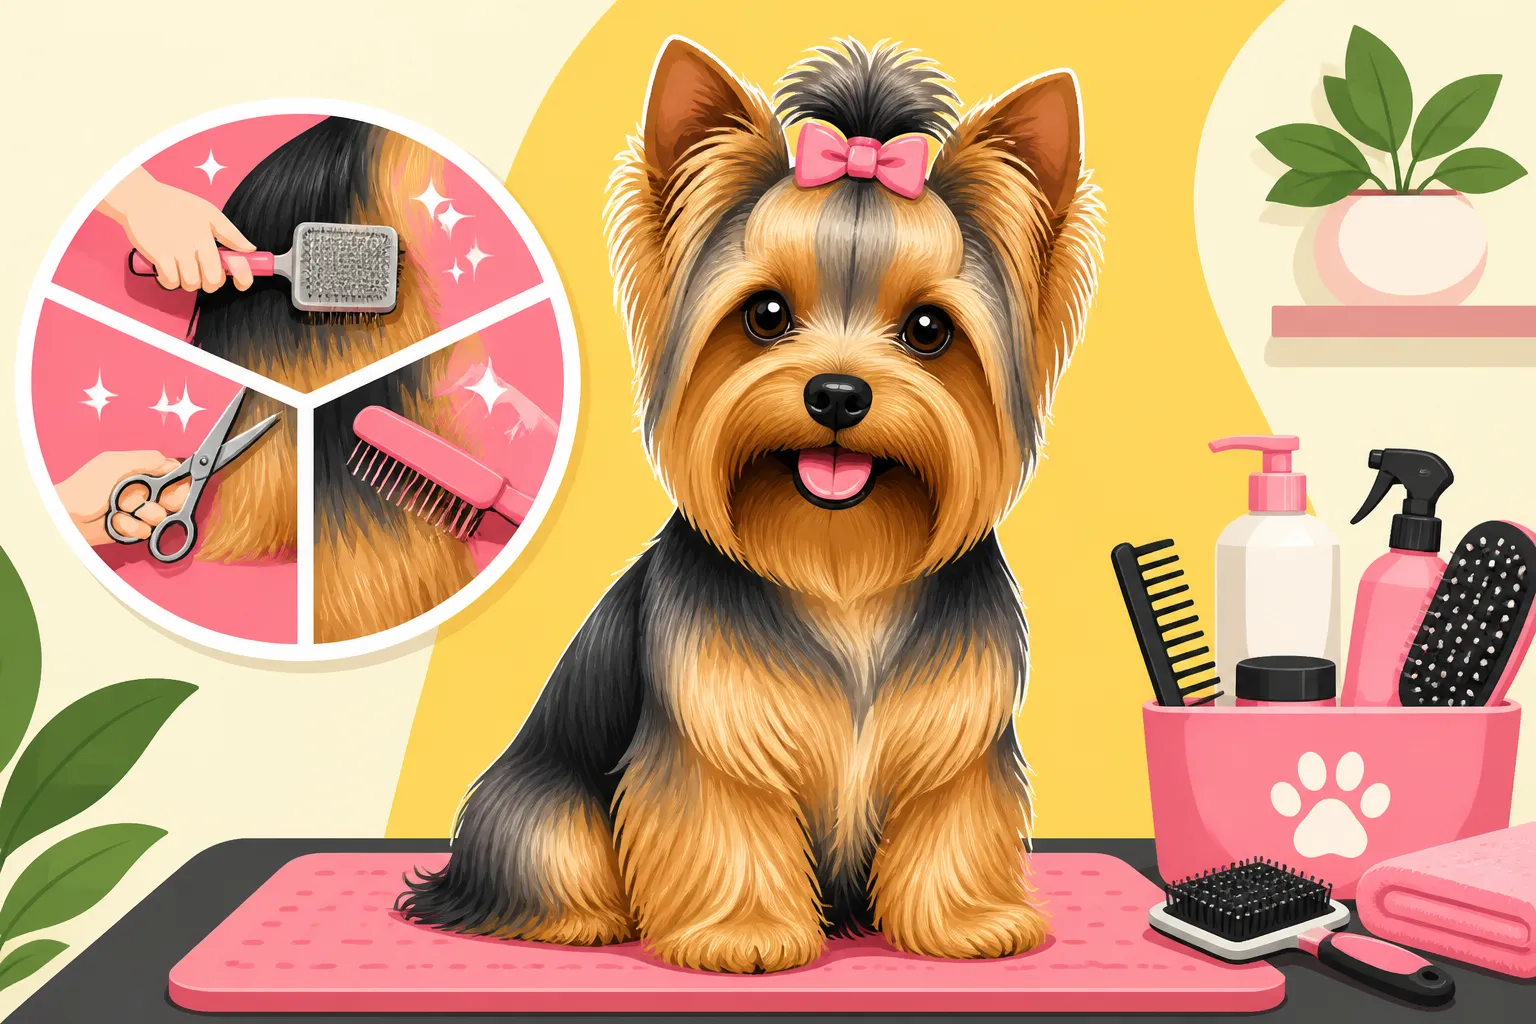
Stepping into the world of at-home grooming can feel overwhelming when you see the sheer array of tools available. But don't fret! You don't need a full professional salon setup, but investing in a few key, good-quality items will make all the difference in achieving a comfortable and effective groom for your Yorkie. Think of it as building your personal "Yorkie spa kit."
Must-Have Brushes and Combs
Your brushing toolkit is the foundation of good grooming. Skipping this step or using the wrong tools can quickly lead to painful mats.
- Pin Brush: This is your everyday workhorse. A good quality pin brush, with polished or rounded pins to avoid scratching your Yorkie's delicate skin, is perfect for general detangling and daily brushing. It helps remove loose hair, prevents superficial knots, and gently massages their skin, stimulating circulation. When you're just doing a quick pass-through, this is your go-to.
- Slicker Brush: For those tougher tangles or for Yorkies with a more cottony coat, a slicker brush is indispensable. Its fine, short wires, closely spaced, are excellent for getting deeper into the coat to remove smaller mats and lift out loose undercoat (even though Yorkies don't have a traditional undercoat, they still shed fine hairs). Just be gentle, as the wires can be sharp if applied with too much pressure. Brands like Chris Christensen or Artero are often recommended by professional groomers for their quality and effectiveness on fine, silky coats.
- Metal Comb (Fine/Medium Teeth): This is your ultimate mat detector and finisher. After using a brush, always follow up with a metal comb, working it through your Yorkie's entire coat, especially in high-friction areas like behind the ears, under the armpits, on the belly, and around the tail. If the comb glides through smoothly, you know you're tangle-free. If it catches, you've found a spot that needs more attention with your slicker brush and potentially some detangling spray. This step is non-negotiable for a truly mat-free coat.
Shampoos, Conditioners, and Sprays
Just like with human hair, the right cleansing and conditioning products are vital for a healthy, manageable Yorkie coat. Don't just grab any old dog shampoo off the shelf.
- pH-Balanced, Tearless Shampoo: Your Yorkie's skin has a different pH level than humans, so always use a shampoo specifically formulated for dogs. Look for tearless formulas, as accidental splashes are inevitable, and you want to avoid irritating their sensitive eyes. Gentle, natural ingredients are always a plus. Many pet owners find that brands like Earthbath or TropiClean offer excellent results, providing a gentle yet effective clean without harsh chemicals. You might also find good options from trusted brands on platforms like Chewy, which often stock a wide range of specialized pet products.
- Conditioner: This is absolutely crucial for a Yorkie's coat. A good conditioner will help seal the hair cuticle, making it smoother, more manageable, and much less prone to tangling. It adds moisture, reduces static, and provides a protective layer. Always follow up shampoo with a generous application of conditioner, letting it sit for a few minutes if directed, then rinsing thoroughly.
- Detangling Spray/Leave-in Conditioner: These products are your secret weapon against knots. A spritz of detangling spray before or during brushing can make a world of difference, helping to loosen tangles and allow your brush or comb to glide through the hair more easily. Some leave-in conditioners also offer additional moisture and protection between baths.
Clippers, Scissors, and Nail Trimmers
Now for the tools that often cause the most apprehension! With practice and the right equipment, these can become less intimidating.
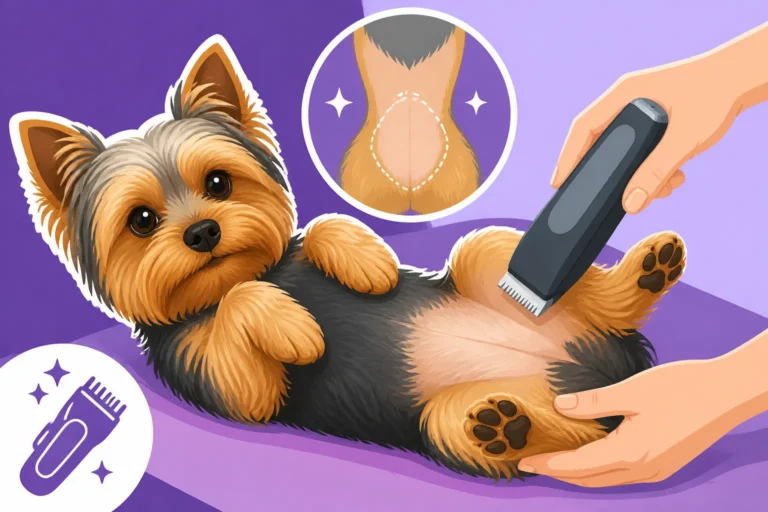
- Small, Quiet Clippers: For body trims, a good quality set of pet clippers is a must. Yorkies are sensitive to noise, so opt for a quieter model. You'll want to use specific blade sizes: a #10 blade is standard for sanitary trims (around the anus and genitals) and paw pads. For a short body cut, a #7F or #5F blade (the "F" stands for finish, meaning it leaves a smoother cut) are good starting points. Brands like Wahl or Andis are reliable choices that offer various blade options. Remember, blades can get hot, so always have cooling spray on hand or switch to a different blade if you feel it heating up.
- Blunt-Nosed Grooming Scissors: Safety is paramount when working around your Yorkie's delicate face, ears, and paws. Blunt-nosed scissors are designed to minimize the risk of accidental pokes or cuts. They are perfect for carefully trimming stray hairs around the eyes, tidying up the ear edges, or giving a neat finish to the paw pads after using clippers. Never, ever use sharp human scissors near a moving dog; the risk is simply too high.
- Nail Clippers (Guillotine or Scissor-style) and a Grinder: Overgrown nails are uncomfortable and can lead to serious paw and joint problems. Choose a nail clipper that feels comfortable in your hand – either the guillotine style or the scissor style, both work well for small breeds. Keep a small container of styptic powder or a styptic pencil handy in case you accidentally cut too far and hit the quick, causing bleeding. Alternatively, a Dremel tool (pet-specific or human-grade with a fine grit sanding band) can be less intimidating for some owners and dogs, as it grinds the nail down gradually, reducing the risk of quicking.
Having these tools ready before you start will make your grooming session smoother and more enjoyable for both you and your precious Yorkie.
The Bathing Process Making it Stress-Free
Bathing your Yorkshire Terrier can either be a delightful splash session or a wrestling match, depending on how you approach it. The key is preparation, gentle handling, and creating a positive experience from start to finish. Remember, bathing is not just about cleanliness; it’s a crucial step in preparing the coat for brushing and trimming.
Pre-Bath Preparation and Detangling
This step is arguably the most important one. Many first-time groomers make the mistake of putting a tangled Yorkie straight into the tub. Don’t do it! Water will tighten any existing mats and knots, making them practically impossible to remove without causing significant pain and needing to cut large sections of hair.
- Brush, Brush, Brush: Before any water touches your Yorkie, give their entire coat a thorough brushing and combing. Use your pin brush, then your slicker brush, and finally, your metal comb to ensure every single tangle and mat is out. Pay extra attention to common problem areas like behind the ears, armpits, inner thighs, and the base of the tail. If you encounter any stubborn mats, apply a detangling spray and gently work them out with your fingers and a comb.
- Gather Your Supplies: Have everything you need within arm's reach before you start. This includes your shampoo, conditioner, a few towels (microfiber works great for absorbing water), cotton balls, and a non-slip mat for the tub or sink.
- Protect Their Ears: Gently place a cotton ball into each of your Yorkie’s ear canals to prevent water from getting in. This helps prevent ear infections, which can be a common concern for small breeds. While you're at it, inspect their ears for any redness or odor, as this could be an early sign of an issue that needs veterinarian attention. You can read more about Yorkie Ear Infections: Prevention to keep those tiny ears healthy.
- Set the Mood: Choose a quiet time when you're not rushed. Speak in a calm, soothing voice. Some people even put on calming music.
Gentle Washing Techniques
Now that your Yorkie is tangle-free and your supplies are ready, it’s time to get wet!
- Non-Slip Safety: Place a non-slip mat at the bottom of your tub or sink. This prevents your Yorkie from slipping and feeling insecure, which can make them anxious.
- Lukewarm Water: Start with lukewarm water. Test it on your inner wrist, just as you would for a baby. It should be comfortable, not hot or cold. Gently wet your Yorkie's entire coat, starting from the neck down, avoiding direct spray into their face.
- Shampoo Application: Apply a small amount of your chosen dog shampoo. If it's concentrated, you might want to dilute it slightly with water in a separate container for easier distribution. Work the shampoo gently into their coat, creating a lather. Pay close attention to all areas – back, sides, belly, legs, and tail. Be extra careful around their face, using a damp washcloth for a gentle wipe rather than pouring water directly.
- Rinse, Rinse, Rinse! This is paramount. Residual shampoo can irritate their skin, cause itching, and leave their coat looking dull and feeling sticky. Rinse thoroughly until the water runs clear and you can't feel any slipperiness on their coat. Lift their legs and ensure you're rinsing their underbelly and armpits.
- Conditioner Time: Once rinsed, apply a generous amount of dog conditioner. Work it through their entire coat, ensuring even distribution. Let it sit for the recommended time (usually a few minutes), then rinse just as thoroughly as you did with the shampoo. A good rinse of the conditioner helps keep their beautiful coat silky and prevents mats from forming easily, contributing to a healthier coat in the long run.
Post-Bath Care and Quick Drying
The bath isn't over until your Yorkie is dry and comfortable!
- Gentle Squeeze: Once you've rinsed all the conditioner, gently squeeze out any excess water from their coat with your hands.
- Towel Wrap: Immediately wrap your Yorkie in a soft, absorbent towel. Microfiber towels are fantastic for this as they soak up a lot of moisture quickly. Gently blot and squeeze the towel against their coat – do not rub vigorously! Rubbing can create immediate tangles and mats, undoing all your hard work from the pre-bath brushing.
- Initial Drying: If your Yorkie is small enough, you can cradle them in your arms, wrapped in a towel, for a few minutes to absorb more water. This initial towel dry is important before moving on to the blow dryer, which we’ll cover in detail next. Getting them as dry as possible at this stage sets the coat up for a faster, more effective blow dry, which is critical for that signature fluffy finish and preventing mats.
Drying Your Yorkie The Key to a Fluff-Free Finish
While a good bath gets your Yorkie clean, proper drying is truly the secret weapon for preventing mats, achieving that beautiful silky texture, and ensuring their skin stays healthy. This isn't a step you want to rush or skip.
Towel Drying and Initial Prep
After their rinse, your Yorkie will still be quite wet. The goal here is to get them as dry as possible with towels before moving on to heat.
- Maximum Absorption: Immediately after the bath, use one or two highly absorbent towels to gently blot and squeeze out excess water. As mentioned, microfiber towels are fantastic for this job. You want to press the towel against their coat, rather than rubbing back and forth, which can rough up the cuticles of their hair and promote tangling.
- Fresh Towel, Fresh Start: Once the first towel is quite damp, switch to a fresh, dry one. Continue to gently pat and squeeze. The more water you can remove at this stage, the less time you’ll spend with the blow dryer, which is generally more comfortable for your Yorkie.
- Keep Them Warm: Yorkies are tiny and can get chilled very easily, especially when wet. After toweling, keep them in a warm room or even wrap them loosely in a towel if you need a moment to set up your drying station. This minimizes discomfort and shivering.
Blow Drying for a Smooth, Mat-Free Coat
This is where the magic happens for that signature Yorkie coat. Air drying is generally not recommended for Yorkies with longer hair because it almost guarantees matting and can lead to skin issues.
- The Right Dryer: While a professional force dryer is ideal for its power and ability to blast water out of the coat quickly, a regular human hairdryer on a cool or low-heat setting can work perfectly fine for at-home grooming. Crucially, never use hot air directly on your Yorkie’s skin, as it can easily cause burns or dry out their skin. Always test the temperature on your wrist. A pet-specific dryer often has more controlled heat settings and quieter motors, which is a bonus.
- Brush While You Dry: This is the most critical technique for a mat-free, straight, and fluffy coat. As you dry, continuously brush your Yorkie’s hair with your slicker or pin brush, working in sections. The combination of heat (low, remember!) and brushing helps to straighten the hair as it dries, preventing it from curling up and knotting.
- Section by Section: Start with one area, like a leg or the back, and work systematically. Use your free hand to lift and separate the hair, directing the airflow to the skin. This ensures thorough drying.
- Focus on Problem Areas: Pay extra attention to the areas most prone to matting: behind the ears, in the armpits, on the chest, and around the tail. These spots need to be completely dry and tangle-free. Inadequately dried hair, especially in dense areas, can lead to skin irritation or even Yorkie Hair Loss if severe matting pulls on the skin.
- Patience is Key: Take your time with the blow-drying process. A thoroughly dried Yorkie is a happy, mat-free Yorkie. If their hair is left damp, even for a short while, it can still knot up. When you’re done, their coat should feel completely dry, fluffy, and silky to the touch.
Air Drying Risks and Why It's Not Recommended
While air drying might seem like the easiest option, especially for a small dog, it comes with significant drawbacks for Yorkshire Terriers.
- Matting is Inevitable: The primary reason against air drying for Yorkies with any length of hair is severe matting. As their fine hair dries naturally, it will curl, intertwine, and form tight knots close to the skin. This process is accelerated by any movement your dog makes. These mats are not only painful to brush out but can also require shaving, which can be upsetting for owners who love their Yorkie's long coat.
- Skin Issues: Leaving a dog damp, especially in areas where air circulation is poor (like armpits, groin, or dense body hair), creates a perfect breeding ground for bacteria and fungi. This can lead to hot spots, yeast infections, or other uncomfortable skin irritations. Yorkies can be prone to sensitive skin, so keeping them thoroughly dry is an important part of their overall How to Keep a Yorkshire Terrier Healthy routine.
- Chilling and Discomfort: As mentioned, Yorkies are small and can easily get cold. Air drying prolongs the cooling effect of evaporation, potentially leading to discomfort, shivering, or even a chill, especially in cooler environments.
- Dull Coat: An air-dried coat often looks dull, frizzy, and lacks the shine and silkiness that proper blow-drying achieves. It simply won't have that polished, well-groomed appearance.
So, while it takes a bit more effort, blow drying your Yorkie completely after a bath is a non-negotiable step for their comfort, health, and maintaining their beautiful coat.
Brushing and Detangling Techniques for Daily Maintenance
Consistent brushing is the cornerstone of keeping your Yorkshire Terrier’s coat in pristine condition. Think of it as a daily ritual that prevents problems before they start, rather than a frantic effort to undo damage. Neglecting this step, even for a few days, can lead to serious matting, especially for Yorkies with longer or cottony coats.
Daily Brushing Routine
A short, daily brushing session is far more effective and less stressful than trying to tackle a week's worth of tangles at once. It should be a calm, positive experience for both of you.
- Consistency is Key: Aim for at least 5-10 minutes of brushing every single day. If your Yorkie has a very long coat or is prone to tangles, twice a day might be even better. Establishing a routine, perhaps in the morning or evening when they're relaxed, helps them understand what to expect.
- Tools for the Job: Start with your pin brush or slicker brush to work through the main body of the coat. Follow up with your metal comb. The comb is essential because it will catch any smaller tangles that the brush might have missed. If the comb glides through effortlessly, you know you’ve done a good job.
- Section by Section (or Layers): Don't just brush the top layer of hair. Gently part their hair, section by section, and brush from the skin outwards. Imagine you’re brushing the hair in layers. This ensures you’re getting down to the root where mats often form first. Pay particular attention to the "hot spots" for mats: behind the ears, armpits, chest, belly, and around the tail and hind legs.
- Use Detangling Spray: Before you start, a light mist of detangling spray or a leave-in conditioner can help lubricate the hair, making brushing easier and reducing static, especially in dry weather. This can be particularly helpful if your Yorkie has a more cottony coat that snags easily.
Tackling Tangles and Mats Safely
Even with diligent daily brushing, a tangle or small mat can occasionally sneak up on you. The golden rule here is: never pull or rip through a mat. This is incredibly painful for your Yorkie and can cause skin irritation or even tears.
- Assess the Mat: First, gently separate the mat from the surrounding healthy hair with your fingers. Get a good look at how close it is to the skin.
- Generous Detangling Spray: Apply a liberal amount of detangling spray directly onto the mat. Let it sit for a minute or two to soften the hair.
- Work Slowly from the Edges: Using your metal comb (or even just your fingers for very small, loose tangles), start working the mat from its outer edges, picking apart tiny strands at a time. Hold the hair at the base of the mat, close to the skin, to prevent pulling on your Yorkie’s skin as you work.
- Slicker Brush Assistance: For slightly larger but still manageable mats, you can use the corner of your slicker brush to gently tease apart the strands, again, working from the outside in.
- Mat Splitters (with caution!): For more stubborn mats that aren't too tight to the skin, a mat splitter (a tool with a razor edge) can be used. Use extreme caution with this tool. Never use it close to the skin, and always ensure you are cutting away from your Yorkie’s body. If in doubt, don't use it.
- When to Cut (Blunt-Nosed Scissors Only): If a mat is too tight, too painful, or simply won't budge with detangling efforts, carefully use your blunt-nosed grooming scissors. Always slide the blunt end under the mat, close to the skin, and cut upwards and away from the body, ensuring the skin is not caught in the blades. If a mat is extremely tight against the skin, it’s best to take your Yorkie to a professional groomer or vet. They have specialized tools and experience to remove severe mats safely, which often involves carefully shaving them out to prevent injury.
- Consider "Yorkie Hair Loss": Sometimes, extensive matting can pull on the hair follicles, leading to patches of hair loss. Addressing mats promptly can help prevent this.
The Importance of Regular Brushing for Overall Health
Beyond just looking good, daily brushing contributes significantly to your Yorkie's overall health and well-being. It's not just a vanity project!
- Circulation and Skin Health: The gentle massage of a brush stimulates blood flow to the skin, which promotes healthy hair growth and keeps the skin supple. It also helps to distribute natural oils throughout the coat, giving it a healthy sheen.
- Early Detection: Brushing is an excellent opportunity for a mini health check. As you run your hands and brush through their coat, you can feel for any lumps, bumps, hot spots, skin irritations, or parasites like fleas and ticks. Early detection of these issues can make treatment much simpler. This routine ties directly into How to Keep a Yorkshire Terrier Healthy by making you intimately familiar with your dog's physical state.
- Prevents Pain: Mats are not just unsightly; they are genuinely painful. They pull on the skin, restrict movement, and can become a breeding ground for infections. Regular brushing prevents this discomfort and keeps your Yorkie happy and mobile.
- Bonding Time: For many Yorkies, a gentle brushing session can be a relaxing and enjoyable experience, especially if introduced positively from puppyhood. It becomes a special bonding time between you and your furry companion, reinforcing trust and affection.
Trimming Your Yorkie's Hair at Home
Trimming can feel like the most intimidating part of at-home grooming, but with the right approach and a steady hand, you can give your Yorkie a clean, comfortable, and stylish look. Remember, the goal for home grooming is often practicality and hygiene rather than a show-ring finish.
Understanding Different Yorkie Haircuts
While professional groomers offer a dizzying array of styles, for at-home maintenance, we generally focus on a few key, manageable cuts.
- The Puppy Cut (or Kennel Cut): This is by far the most popular and practical cut for pet Yorkies, especially for home groomers. It involves clipping the body hair to a uniform, shorter length (typically anywhere from 1/2 inch to 1 inch, depending on your blade choice), with the face, ears, and tail often left a bit longer or shaped. It’s low-maintenance, comfortable for the dog, and significantly reduces the risk of matting. It keeps them clean and cool in warmer weather. If you want to dive deeper into this style, checking out "Yorkie Puppy Cut: What to Know" can provide more specific insights.
- The Teddy Bear Cut: Similar to the puppy cut but often leaves the hair on the face slightly rounder and fuller, giving a soft, "teddy bear" appearance. The body is still kept relatively short for easy care.
- The Show Cut: This is the traditional, very long, flowing coat that touches the floor. It requires daily, extensive brushing, conditioning, and wrapping to prevent breakage and matting. This is rarely maintained by average pet owners at home due to the immense commitment involved.
- The "Pet Clip": This is a broad term that essentially means any practical, shorter cut designed for a pet's comfort and ease of maintenance, rather than strict breed standards. This is what most home groomers aim for, allowing for customization to suit your Yorkie's lifestyle and your own grooming comfort level.
Step-by-Step Trimming with Clippers
Before you begin, ensure your Yorkie is completely clean, dry, and thoroughly brushed with absolutely no tangles or mats. Clippers will snag on tangles, causing pain and an uneven cut.
- Preparation is Key: Gather your clippers, chosen blades, scissors, a comb, and perhaps some treats for positive reinforcement. Ensure your clippers are charged or plugged in, and have blade cooling spray handy.
- Choose Your Blade: For a standard puppy or kennel cut on the body, a #7F blade will give a nice, relatively short, clean finish. A #5F blade will leave the hair a bit longer. A #10 blade is primarily for sanitary areas and paw pads.
- Start with Sanitary Areas: This is often the most important area for hygiene. With your #10 blade, carefully trim the hair around your Yorkie's anus and genitals. Always pull the skin taut to prevent nicks, and work slowly. Be extremely cautious and take frequent breaks if your Yorkie is squirmy.
- Paw Pads: Still with the #10 blade, gently trim the hair between your Yorkie's paw pads. This prevents slipping on smooth floors and reduces the accumulation of dirt, debris, and moisture, which can lead to infections.
- Body Trim: Attach your chosen body blade (e.g., #7F). Always shave with the direction of hair growth, not against it, for a smoother, more even cut that avoids clipper irritation. Start at the neck and work your way down the back, sides, and belly. Maintain even pressure and overlap your strokes slightly. Remember to pull the skin taut in loose areas, like the armpits and flank, to prevent nicks. Be mindful of bony areas and skin folds.
- Legs: Extend the body trim down the legs. For a uniform look, you can use the same blade as the body. For a slightly softer look, you might switch to a longer guard comb over your blade, but for beginners, consistency with one blade is often easier.
Scissoring the Face, Paws, and Sanitary Areas
Scissoring requires a very steady hand and blunt-nosed scissors for safety. These are the detail areas that really define the cut.
- Face Trimming: This is the most delicate area.
- Around the Eyes: Gently hold your Yorkie’s muzzle and carefully trim any hair that could fall into their eyes. This prevents irritation, improves vision, and reduces tear staining. Always point the blunt end of the scissors away from the eye. A small, sterile comb can help you separate the hairs. Keeping hair out of the eyes is crucial for preventing Yorkie Eye Problems Explained down the line. If you notice a lot of gunk or excessive weeping, you might also be dealing with Why Is My Yorkie Tear Stains, so addressing the hair is a good first step.
- Muzzle: Trim around the muzzle to keep it tidy and prevent food from getting stuck in long hairs. Aim for a rounded or slightly squared look, depending on your preference.
- Ears: Yorkies often have hair growing out of their ears. Trim the hair on the outside of the ear leather, making sure the edges are neat. For the hair inside the ear canal, it’s often best to pluck it (if sparse) or have a vet or professional groomer do it, as it helps with air circulation and can prevent ear infections.
- Paws Finishing: After clipping the pads, use your blunt-nosed scissors to trim the hair around the perimeter of the paw, giving it a neat, rounded "cat paw" appearance. Ensure all long hairs between the toes and around the edges are tidied up. This prevents snow, mud, or debris from getting matted in their paw hair.
- Sanitary Touch-Ups: After the initial clipper work, use your scissors to trim any remaining stray hairs around the anus and genitals, ensuring maximum hygiene. Always be incredibly careful in these sensitive areas, pulling the skin taut to create a flat surface for trimming.
Remember to take breaks, offer praise and treats, and always prioritize your Yorkie's comfort and safety over achieving a perfect cut. It's a learning process, and every session will build your confidence!
Nail Trimming and Paw Care
Nail trimming is one of those grooming tasks that many pet parents dread, but it's incredibly important for your Yorkie’s comfort and long-term health. Overgrown nails can cause serious problems, and regular paw care is essential for happy feet.
The Importance of Regular Nail Trims
Think about how uncomfortable it would be if your own toenails grew so long they started pushing against your shoes and curving under your toes. That's precisely what happens to dogs with overgrown nails, but amplified.
- Pain and Discomfort: When a Yorkie's nails get too long, they hit the ground with every step. This pushes the nail back into the nail bed, causing significant pain and pressure on the toe joints. Imagine walking on your tiptoes all the time – it’s exhausting and painful.
- Structural Problems: Over time, continuously long nails can actually deform your Yorkie's feet, causing their toes to splay out and changing their natural gait. This unnatural posture puts stress on their leg joints and spine, potentially leading to orthopedic issues. This directly impacts How to Protect a Yorkie's Joints in the long run.
- Increased Risk of Injury: Long nails are more prone to snagging on carpets, furniture, or outdoor terrain, which can lead to painful tears or even avulsion (the nail being ripped off), often requiring veterinary attention. They can also grow so long they curl back and puncture the paw pad, leading to infection.
- Traction Issues: Overgrown nails reduce your Yorkie's natural traction on smooth surfaces, making them more likely to slip and fall, which can lead to injuries.
- Frequency: For most Yorkies, nails should be trimmed every 2-4 weeks. If you hear their nails clicking on hard floors, they're definitely too long.
Step-by-Step Nail Trimming Techniques
Patience and a good technique will make nail trims less stressful for both of you.
- Gather Your Tools: Have your nail clippers (guillotine or scissor style, whichever you prefer and feels safest), styptic powder or a styptic pencil, and some high-value treats ready.
- Find a Calm Environment: Choose a quiet spot where your Yorkie feels secure. If they're nervous, try trimming just one paw at a time over several sessions.
- Hold the Paw Firmly but Gently: Support the paw and extend one toe. Gently push back the hair from the nail so you have a clear view.
- Identify the Quick: The "quick" is the pink, sensitive part inside the nail that contains blood vessels and nerves. Cutting into the quick is painful and will cause bleeding.
- On Clear/Light Nails: You can usually see the pink quick through the translucent nail. You want to cut only the clear tip, just before the quick.
- On Dark Nails: This is trickier. You'll need to make very small cuts. The very tip of a dark nail, when cut, will show a whitish or grayish center. As you get closer to the quick, a small, dark dot will appear in the center. Stop cutting immediately if you see this, as the quick is very close.
- Make Small, Confident Cuts: Use sharp clippers. Dull clippers can crush the nail, which is uncomfortable. Position the clipper at a slight angle, just below the quick, and make a quick, firm cut.
- What if You Quick Them? It happens to the best of us! Don't panic. Immediately apply styptic powder to the bleeding nail and apply gentle pressure. The bleeding should stop quickly. Reassure your Yorkie calmly, offer a treat, and perhaps take a break. Don't scold them.
- Consider a Dremel/Grinder: Many owners find a rotary tool (like a Dremel with a fine sanding band) less intimidating than clippers, especially for dark nails. Grinding wears the nail down gradually, giving you more control and reducing the risk of hitting the quick. Introduce the sound and vibration slowly, rewarding your Yorkie for calm behavior.
Paw Pad Health and Maintenance
Your Yorkie’s paw pads are their connection to the world, taking the brunt of every walk and play session. Keeping them healthy is crucial.
- Regular Checks: Make it a habit to inspect your Yorkie’s paw pads regularly, especially after walks. Look for any cuts, cracks, punctures from thorns or glass, redness, swelling, or foreign objects lodged between the pads.
- Hair Trimming: As discussed in the trimming section, regularly trim the hair between the paw pads with a #10 clipper blade or blunt-nosed scissors. Excess hair can collect dirt, debris, and moisture, leading to matting, irritation, or even yeast infections between the toes.
- Moisturize Dry Pads: Just like human skin, paw pads can become dry and cracked, especially in harsh weather conditions (cold winters, hot summers). A pet-safe paw balm (like Musher's Secret or any beeswax-based balm) can help moisturize and protect them. Gently rub a small amount into their pads, especially before and after walks in extreme conditions.
- Protection from Extremes: In very hot weather, asphalt and pavement can reach scorching temperatures, causing burns. In winter, ice, salt, and chemicals can irritate and damage paw pads. Consider paw booties for protection or use paw balm as a barrier. Always wipe their paws after walks to remove any irritants.
By being diligent with nail trimming and paw pad care, you're not just grooming; you're actively contributing to your Yorkie's comfort, mobility, and overall health.
Ear and Eye Cleaning Keeping Your Yorkie Bright and Clear
The delicate areas around your Yorkie's eyes and ears require special attention during grooming. Proper cleaning not only keeps them looking tidy but also prevents common health issues that can cause discomfort.
Routine Ear Cleaning for Prevention
Yorkshire Terriers, like many breeds, can be prone to ear issues if their ears aren't properly maintained. The hair that grows in their ear canals can trap moisture, wax, and debris, creating a perfect environment for bacteria and yeast to thrive.
- Why it's Important: Regular cleaning helps prevent the buildup of wax and debris, reduces moisture, and promotes air circulation within the ear canal. This proactive approach is key to preventing painful ear infections. In fact, a good routine is a major component of Yorkie Ear Infections: Prevention.
- Gather Your Supplies: You'll need a vet-approved ear cleaning solution for dogs (never use rubbing alcohol or hydrogen peroxide, as they can be irritating), and cotton balls or soft gauze pads. Avoid cotton swabs (Q-tips) for cleaning inside the ear canal, as they can push debris further in or damage the delicate ear structures.
- The Cleaning Process:
- Inspect First: Before you clean, gently lift your Yorkie’s ear flap and inspect the visible part of the ear canal. Look for redness, swelling, excessive wax, a strong odor (often yeasty or foul), or any discharge. If you see any of these signs, consult your vet before cleaning, as an infection might be present.
- Apply Cleaner: Following the instructions on your ear cleaner, apply a small amount directly into the ear canal. Don't be shy; you need enough to loosen debris.
- Massage the Base: Gently massage the base of your Yorkie’s ear for 20-30 seconds. You might hear a squishing sound, which means the cleaner is working to break up wax and debris.
- Allow Them to Shake: Step back and let your Yorkie shake their head. This helps dislodge loosened debris.
- Wipe Clean: Use a fresh cotton ball or gauze pad to gently wipe away any visible solution and debris from the outer ear and the entrance of the ear canal. Don't try to go deep into the canal. Repeat with fresh cotton balls until no more debris comes out.
- Hair Removal (Optional/Professional): Some Yorkies have a lot of hair growing inside their ear canals. This can be carefully plucked (if sparse) or trimmed by a vet or professional groomer to further improve air circulation. If you're unsure, leave this to the pros.
- Frequency: For most healthy Yorkies, cleaning their ears once a month is sufficient. If they are prone to infections or swim frequently, you might need to clean them more often.
Eye Area Maintenance and Tear Stain Management
Those big, expressive Yorkie eyes are adorable but can be prone to tear staining and irritation if not properly cared for.
- Daily Wiping: The simplest and most effective step is to gently wipe around your Yorkie’s eyes daily with a soft, damp cloth or pet-specific eye wipes. This removes crusts, sleep, and any fresh tear residue before it has a chance to dry and stain.
- Keep Hair Trimmed Away: Long hair around the eyes is a major culprit for irritation and excessive tearing. Ensure this hair is kept meticulously trimmed (as discussed in the trimming section, using blunt-nosed scissors, always pointing away from the eye). Hair constantly rubbing against the eye can cause irritation, leading to more tearing, which then exacerbates staining. Regular trimming here also helps prevent Yorkie Eye Problems Explained and other discomforts.
- Addressing Tear Stains: Tear stains are those reddish-brown streaks that appear below the eyes. They are caused by porphyrins, iron-containing molecules excreted in tears, which oxidize upon exposure to air and light.
- Genetics and Diet: Some Yorkies are genetically predisposed to more tearing. Diet can also play a role; sometimes switching to a high-quality food or using purified water instead of tap water can help reduce staining.
- Underlying Issues: While often cosmetic, excessive tearing can sometimes indicate an underlying issue like allergies, blocked tear ducts, eye irritation from foreign objects, or even a dental problem. If you notice a sudden increase in tearing, or if your Yorkie's eyes seem irritated, red, or swollen, consult your veterinarian.
- Over-the-Counter Products: There are many over-the-counter tear stain removers available (often found on Amazon or Chewy). These can be effective for reducing the appearance of existing stains. Look for gentle, natural formulations. Apply them carefully with a cotton ball, avoiding direct contact with the eye itself. Consistency is key with these products.
- Professional Cleaning: For very stubborn, long-standing stains, a professional groomer can sometimes carefully trim the stained hair, and some vets may offer more advanced solutions if there's an underlying medical cause.
By making ear and eye care a regular part of your grooming routine, you'll ensure your Yorkie remains comfortable, healthy, and their sparkling personality truly shines through.
Dental Care at Home A Vital Part of Overall Health
While we often focus on brushing coats and trimming nails, dental care is arguably one of the most neglected yet crucial aspects of at-home grooming for Yorkshire Terriers. Ignoring their oral health can lead to a cascade of painful and expensive problems.
Why Yorkies Are Prone to Dental Issues
Yorkies are unfortunately predisposed to dental disease, often more so than larger breeds. There are a few key reasons for this vulnerability:
- Small Mouths, Crowded Teeth: Yorkies have tiny mouths, but they still pack in the same number of teeth as much larger dogs. This crowding means their teeth are often packed tightly, leading to increased plaque and tartar buildup because food particles and bacteria get trapped easily, and it's harder for their natural chewing action to clean them.
- Genetic Predisposition: Many small breeds, including Yorkshire Terriers, are genetically prone to developing dental disease early in life. It's not uncommon to see significant plaque and gingivitis in Yorkies as young as 2-3 years old, sometimes even younger.
- Consequences of Neglect: Left unchecked, plaque hardens into tartar, which then leads to gingivitis (inflammation of the gums). This can progress to periodontal disease, where the supporting structures of the teeth are destroyed. This results in painful infections, tooth loss, and even systemic health issues. Bacteria from severe dental disease can enter the bloodstream and affect vital organs like the heart, kidneys, and liver. This is a very serious concern and highlights why Yorkshire Terrier Dental Disease: Signs and Care is so important to understand.
Brushing Your Yorkie's Teeth
Daily tooth brushing is the single most effective thing you can do at home to prevent dental disease. Yes, daily!
- The Right Tools:
- Pet-Specific Toothbrush: Human toothbrushes are often too large and firm for a Yorkie’s small mouth. Look for a small, soft-bristled pet toothbrush, a finger brush, or even a gauze pad wrapped around your finger for beginners.
- Pet-Specific Toothpaste: This is critical! Human toothpaste contains fluoride and other ingredients that are toxic to dogs if swallowed. Always use an enzymatic pet toothpaste that comes in flavors dogs enjoy (like poultry or peanut butter).
- Making it a Positive Experience:
- Start Early: If you have a puppy, start introducing tooth brushing as early as possible.
- Go Slow: Don't expect perfection on day one. Start by letting them lick some toothpaste off your finger. Then, introduce the brush, letting them mouth it.
- Short Sessions: Initially, aim for just a few seconds, gradually increasing the time.
- Reward: Always follow brushing with praise and a high-value treat to create a positive association.
- The Technique:
- Lift your Yorkie's lip to expose their teeth and gums.
- Angle the bristles at a 45-degree angle to the gum line.
- Gently brush in small, circular motions.
- Focus on the outer surfaces of the teeth, especially the upper back molars, as these are often where plaque builds up fastest. Don't worry too much about the inner surfaces; your dog's tongue usually keeps those relatively clean.
- Aim for 30-60 seconds on each side, if possible.
- Consistency is Key: Just like with our own teeth, daily brushing is what truly makes a difference in preventing plaque and tartar buildup. This regular routine is essential for How to Prevent Dental Disease in Yorkies.
Other At-Home Dental Aids
While brushing is king, other products can complement your efforts and help maintain good oral hygiene between brushings.
- Dental Chews: Choose dental chews specifically designed for small dogs and approved by the Veterinary Oral Health Council (VOHC) for plaque and/or tartar control. Brands like Greenies, Virbac C.E.T. VeggieDents, or Ark Naturals are popular choices. Always supervise your Yorkie when they are consuming dental chews to prevent choking, and ensure the chew is an appropriate size and hardness for their tiny teeth. Avoid overly hard chews that can fracture teeth.
- Dental Water Additives: These are liquids you add to your Yorkie's drinking water. They contain ingredients that help reduce bacteria in the mouth and can slow plaque formation. They are an easy, passive way to provide some daily dental support, but they are not a substitute for brushing. Brands like Vetradent or TropiClean Fresh Breath offer good options.
- Oral Gels and Sprays: There are also various enzymatic gels and sprays that you can apply directly to your dog's teeth and gums. These help to break down plaque and kill bacteria. They can be a good option for Yorkies who are very resistant to brushing.
- Regular Vet Check-ups and Professional Cleanings: Even with the best at-home care, Yorkies will almost certainly need professional dental cleanings under anesthesia at your veterinarian’s office. These cleanings allow for thorough scaling (above and below the gum line), polishing, and dental X-rays to assess the health of the tooth roots. Your vet can advise you on the frequency, but many Yorkies require professional cleanings every 1-2 years. These professional cleanings are a vital part of Yorkie Dental Disease Prevention and overall health.
By integrating daily tooth brushing and other dental aids into your routine, you are making a profound investment in your Yorkie’s health, comfort, and longevity. Don't underestimate the power of a healthy mouth!
Grooming Tool Comparison Table
To help you keep track of the many tools we’ve discussed, here’s a handy comparison table outlining their primary uses and why each one is important for at-home Yorkie grooming.
| Tool Type | Primary Use | Why It's Important |
|---|---|---|
| Pin Brush | Daily brushing, general detangling, distributing oils | Gently removes loose hair, prevents superficial mats, stimulates circulation, and maintains a healthy sheen. |
| Slicker Brush | Removing smaller mats, fluffing the coat, deeper detangling | Effective for cottony coats, reaches deeper into the hair, helps lift and separate strands, and contributes to a smooth finish after drying. |
| Metal Comb (Fine/Medium) | Checking for hidden mats, precision detangling | Essential for ensuring the coat is completely tangle-free down to the skin, especially in dense areas. |
| Blunt-Nosed Scissors | Trimming face, paws, sanitary areas for safety | Prevents accidental pokes or cuts in sensitive areas like around the eyes, ears, and paw pads. |
| Nail Clippers / Grinder | Regular nail trims to prevent overgrowth | Prevents discomfort, splayed feet, and serious joint issues caused by long nails. |
| Pet Shampoo & Conditioner | Bathing, cleansing, moisturizing the coat | Maintains coat health, prevents skin irritation, ensures hair is clean and manageable, and reduces static for easier brushing. |
| Detangling Spray | Easing knot removal, reducing static | Lubricates hair, making it easier to brush through tangles without pain or breakage. |
| Pet-Specific Force Dryer | Efficient, thorough drying after bath | Prevents mats from forming, ensures skin is completely dry (reducing risk of irritation), and creates a beautiful, fluffy finish. |
| Pet Toothbrush & Paste | Daily dental hygiene, plaque removal | Crucial for preventing dental disease, gum inflammation, and the systemic health issues associated with poor oral health. |
| Ear Cleaner (Vet-Approved) | Routine ear hygiene, wax/debris removal | Prevents ear infections by keeping the ear canal clean and dry, reducing buildup of moisture and debris. |
| Eye Wipes / Gentle Cloth | Daily cleaning around eyes, tear stain management | Removes eye discharge and tear residue, helping to prevent irritation and minimize tear staining. |
This table should serve as a handy checklist when you're preparing for your next at-home grooming session!
Disclaimer
The information provided in this article is for general informational purposes only and is not a substitute for professional veterinary advice. Always consult with a qualified veterinarian or professional groomer for any health concerns or before making any decisions related to your Yorkshire Terrier's care and grooming regimen. While we strive for accuracy, individual results may vary, and the specific needs of your dog should always be taken into account.