How to Give a Yorkie a Puppy Cut
If you're a Yorkshire Terrier parent, you know the struggle: that beautiful, fine hair, while gorgeous, can be a real handful to maintain. It mats easily, gets tangled, and sometimes you just want to give your little fluffball a practical, adorable look that’s easier on both of you. This comprehensive guide is here to walk you through exactly how to give your beloved Yorkie that irresistible puppy cut right at home, making grooming less daunting and much more rewarding.
Understanding the Yorkie Coat and the Puppy Cut Appeal
Before you even think about picking up clippers, it's really helpful to understand what makes a Yorkie's coat so unique and why the "puppy cut" has become such a beloved style for this breed. It’s not just about aesthetics; it's often about practicality and comfort too.
The Unique Texture of a Yorkie's Coat
Unlike many other dog breeds that have fur, Yorkshire Terriers boast a single coat of fine, silky hair that's remarkably similar to human hair. This is why they’re often considered a good choice for people with allergies, as they shed minimally compared to fur-bearing dogs. However, this beautiful, flowing coat comes with its own set of challenges. Because it grows continuously and is so fine, it's incredibly prone to tangling and matting. Even a day or two without brushing can lead to stubborn knots, especially in high-friction areas like behind the ears, under the legs, and around the collar. These mats aren't just unsightly; they can be painful for your Yorkie, pulling on their skin and potentially leading to skin infections if left untended. Regular care, like a thorough How to Brush a Yorkie's Coat, is absolutely essential.
Why the Puppy Cut is So Popular
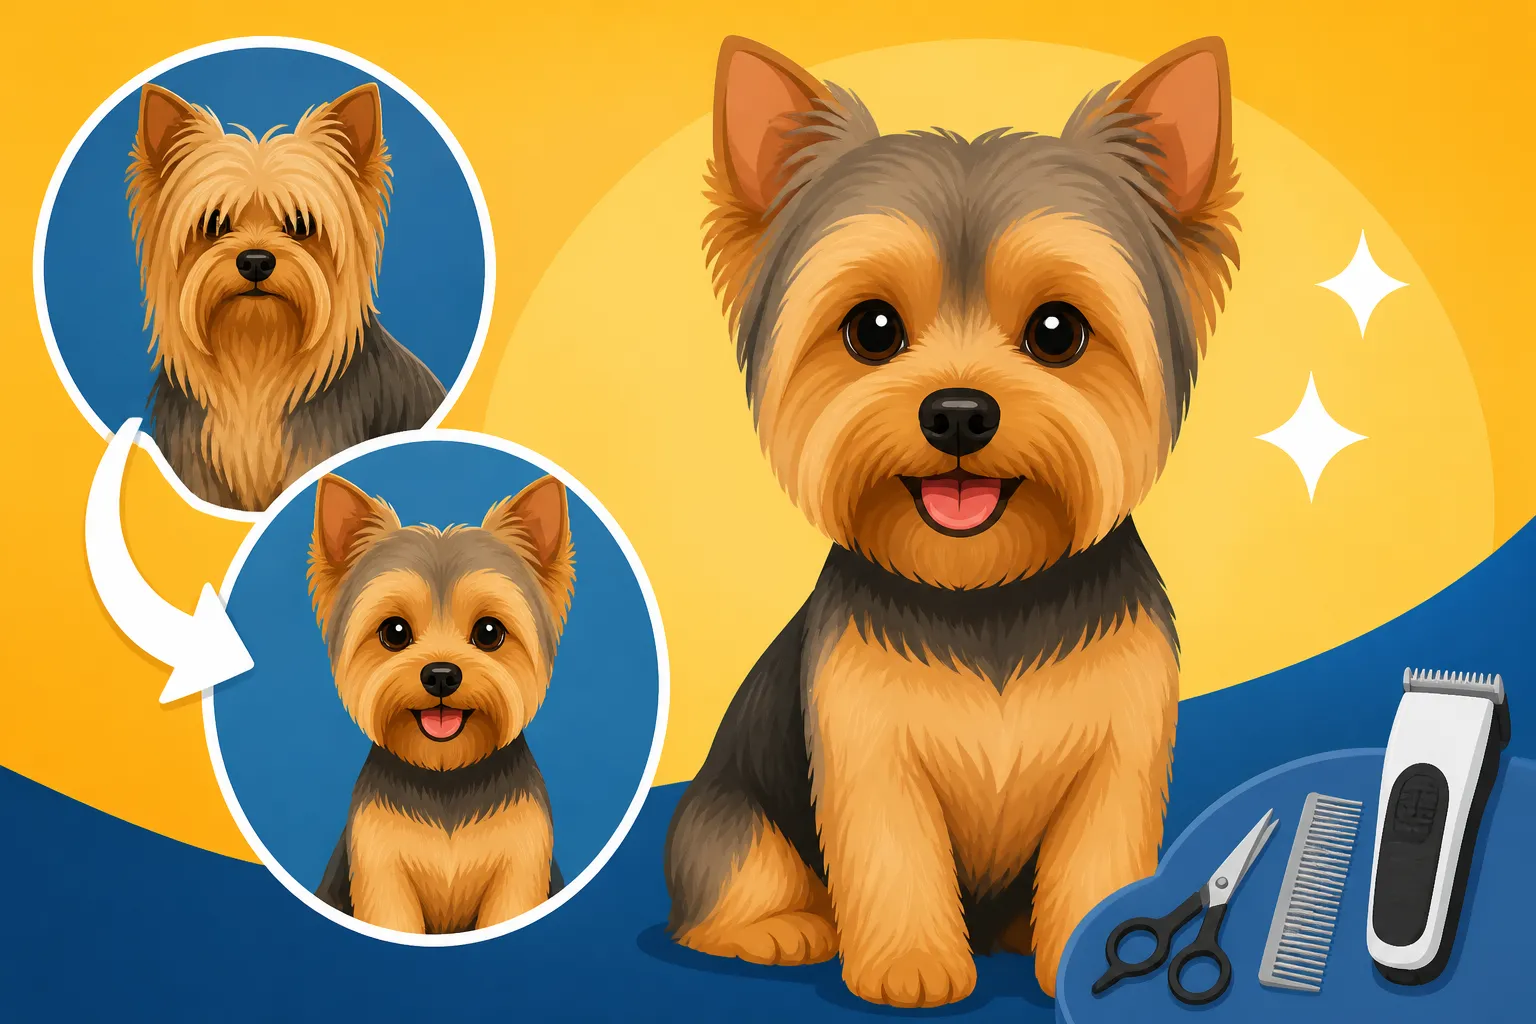
The puppy cut, sometimes also referred to as a "teddy bear cut" or a "kennel cut," is essentially a shorter, uniform cut all over the dog's body. The hair is typically left about 1/2 to 1 inch long, though it can vary slightly. It's wildly popular for several compelling reasons, which often outweigh the desire for a traditional long, flowing show coat for many pet parents.
First and foremost, it’s about low maintenance. When the hair is kept short, it's far less likely to tangle and mat, drastically reducing the time you spend on daily brushing. This means less stress for both you and your Yorkie. Secondly, it’s incredibly comfortable for your dog, especially in warmer climates. Shorter hair helps them stay cooler and prevents overheating. Imagine wearing a long, heavy coat all summer – that’s what it can feel like for a long-haired Yorkie! Lastly, there’s no denying the sheer adorableness of the look. It gives adult Yorkies the perpetual appearance of a cute, mischievous puppy, accentuating their bright eyes and playful personality. For these reasons, the puppy cut is a fantastic option for a Yorkshire Terrier Daily Care Routine that prioritizes comfort and ease.
Essential Tools and Supplies for a DIY Puppy Cut
Embarking on a DIY grooming adventure for your Yorkie's puppy cut requires more than just enthusiasm; it demands the right equipment. Having the proper tools on hand will make the process smoother, safer, and ultimately more successful, giving you results that look professional and keep your little one happy.
Gathering Your Grooming Arsenal
Before you even think about turning on clippers, set up your grooming station. Choose a quiet, well-lit area where your Yorkie feels secure, ideally on a non-slip surface or a grooming table if you have one. Gather all your tools first, so you're not scrambling mid-groom.
Here's a checklist of what you'll need:
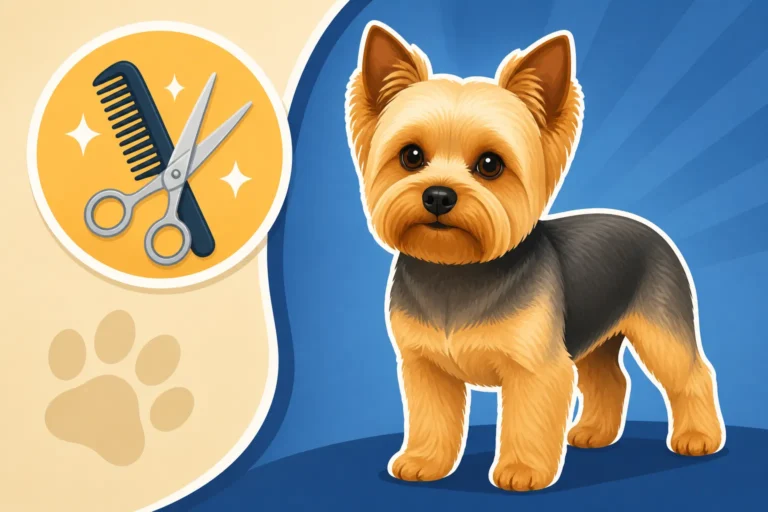
- Dog Clippers: This is the cornerstone of your puppy cut. Look for quiet, powerful clippers designed for dog grooming.
- Clipper Blades: You'll need a few different sizes. Common choices for a puppy cut include a #7F or #10 blade for the body, and perhaps a #30 or #40 blade for sanitary areas.
- Grooming Shears (Scissors): You'll need a few types:
- Straight Shears: For general trimming and shaping.
- Blunt-nosed/Safety Shears: Essential for sensitive areas around the eyes and face, minimizing the risk of accidental pokes.
- Thinning Shears: To blend lines and remove bulk for a natural look.
- Stainless Steel Comb: A good quality comb with both wide and fine teeth is crucial for detangling and checking for mats before and during the cut.
- Slicker Brush: Excellent for removing loose hair and small tangles.
- Detangling Spray/Conditioner: Helps loosen mats and makes brushing easier.
- Dog Shampoo and Conditioner: A clean coat is easier to cut. Choose formulas gentle for dogs. You can find a wide range of options on sites like Chewy.
- High-Absorbency Towels: For drying after the bath.
- Pet Dryer (Optional but Recommended): A dedicated pet dryer (not a human hairdryer, which can be too hot and noisy) helps fluff the coat for an even cut.
- Nail Clippers and Styptic Powder: For trimming nails and stopping any accidental bleeding. Knowing How to Trim a Yorkie's Nails safely is paramount.
- Ear Cleaner and Cotton Balls: For post-grooming ear hygiene. Read up on How to Clean a Yorkie's Ears to avoid irritation.
- Treats: Plenty of small, high-value treats for positive reinforcement!
Choosing the Right Clippers and Blades
Selecting the right clippers for your Yorkie is a game-changer. You want something that's not too loud, as the noise can scare smaller dogs, but powerful enough to glide through their fine hair without snagging. Professional-grade clippers from brands like Wahl or Andis are often recommended and can be found on Amazon. These typically come with interchangeable blades.
For a puppy cut, the blade size determines the length of hair left on your Yorkie's body. Here's a general guide:
- #7F Blade (about 1/8 inch / 3.2mm): This is a popular choice for a slightly longer, fluffier puppy cut. It leaves enough hair to protect the skin but keeps it neat.
- #10 Blade (about 1/16 inch / 1.6mm): This will give a shorter, very neat puppy cut. It’s excellent for dogs prone to matting or for warmer weather.
- Clipper Guards/Combs: Many clippers come with plastic or metal comb attachments that fit over a #10 or #30 blade to leave even longer hair (e.g., 1/2 inch, 3/4 inch). If you want a longer "fluffy" puppy cut, these are ideal. For instance, using a 1/2-inch guard over a #10 blade will give a lovely, soft puppy look.
Remember to always have multiple blades on hand, especially if you plan on doing the full groom in one sitting. Blades can heat up quickly, which can be uncomfortable or even burn your Yorkie's skin. Swap them out frequently, allowing hot blades to cool, or use a blade coolant spray.
Step-by-Step Guide to Giving Your Yorkie a Puppy Cut at Home
Now that you've got your grooming station ready and your tools laid out, it's time to actually get to the cutting! Taking your time and working systematically will help ensure a safe, even, and adorable puppy cut. This is a crucial part of How to Groom a Yorkshire Terrier at Home.
Preparation is Key
A successful groom starts long before the clippers touch the coat. Proper preparation will make the entire experience smoother for both you and your Yorkie.
- Brush Thoroughly: Before bathing, give your Yorkie a comprehensive brush-out with a slicker brush and a metal comb. This is critical to remove any existing tangles, loose hair, and small mats. Attempting to clip a matted coat can pull on the skin, cause pain, and damage your clippers. If you encounter any significant mats, try to gently work them out with a detangling spray and comb. If they're too tight, it might be safer to carefully cut them out with blunt-nosed scissors, holding the skin taut.
- Bathe and Dry: After brushing, give your Yorkie a bath. Use a good quality dog shampoo and conditioner. A clean coat is much easier to cut and will result in a crisper, more even finish. Ensure you rinse all shampoo and conditioner out thoroughly to prevent skin irritation. After the bath, towel dry your Yorkie as much as possible, then use a pet dryer on a cool or low-heat setting to completely dry and fluff the coat. It’s important that the hair is entirely dry before clipping, as wet hair can clog clippers and lead to an uneven cut. Fluffing the coat with a brush while drying helps ensure all hairs stand up, making for a more uniform cut. Learn more about How Often to Bathe a Yorkshire Terrier to maintain their coat.
Clipping the Body
With your Yorkie clean, dry, and brushed, you can begin the clipping process. Start with the body, working from top to bottom.
- Choose Your Blade/Guard: Select your desired blade (e.g., #7F or #10) or attach a clipper guard for a longer cut (e.g., 1/2 inch).
- Start at the Back: Begin clipping at the back of your Yorkie’s neck and work your way down their back towards their tail. Always clip with the direction of hair growth for a smoother, more natural finish. If you clip against the grain, the cut will be much shorter and can sometimes irritate the skin. Use long, even strokes, keeping the clippers flat against the body.
- Sides and Chest: Move to the sides of the body, then the chest. Be extra cautious around bony areas, folds of skin, and nipples, as these can be easily nicked. Use your free hand to gently stretch the skin taut, which helps prevent it from getting caught in the clipper blades.
- Belly and Sanitary Area: Carefully lift your Yorkie to access their belly. Use a shorter blade, like a #10 or even a #30 or #40, for the sanitary area (around the anus and genitals) for hygiene. Be extremely gentle here, always keeping the blade flat and skin taut.
- Legs: Extend the same blade/guard you used for the body down the legs. Clip with the grain, creating a uniform length from the body down to the paws. The goal is a consistent "puppy-like" fluffiness.
Shaping the Head and Face
This is where the "puppy" charm really comes to life! The face typically involves more scissor work to create that soft, rounded look.
- Around the Eyes: This is a very sensitive area. Use blunt-nosed safety shears and always hold the hair away from the eye, trimming small sections at a time. The goal is to remove hair that could obstruct vision or irritate the eyes, creating a clean, open look. Be incredibly patient and take frequent breaks if your Yorkie gets squirmy. To clean up tear stains, you might want to learn How to Clean Yorkie Tear Stains separately.
- Muzzle and Chin: Use your straight shears or thinning shears to carefully trim the hair around the muzzle, giving it a soft, rounded shape that frames their face. You want to avoid any harsh lines. Trim the hair on the chin to match the overall length.
- Ears: Yorkies often have hair trimmed short on the tips of their ears to help them stand up properly and give a neat appearance. Use straight shears or even a #10 blade very carefully on the outside of the ear leather, avoiding the delicate inner ear.
- Top Knot Area: For the top of the head, you can either keep it trimmed short with thinning shears to match the body, or if you prefer a slightly longer top knot that can be tied up later, you'll trim it to a manageable length. If you're aiming for a true puppy cut, a shorter, rounded crown is typical. If you're aiming for a different style, like a Yorkie Teddy Bear Cut: What to Know, the face and head might require slightly different shaping.
Trimming Legs and Paws
Neat legs and tidy paws complete the adorable puppy cut.
- Legs (Refinement): After using clippers on the legs, use your straight shears to refine the shape. You want them to look like little fluffy cylinders, not spindly or uneven. Comb the hair downwards and trim any stray hairs that stick out.
- Paws: This requires careful scissor work.
- Pads: Use blunt-nosed shears to trim the hair between the paw pads. This is important for traction, hygiene, and preventing mats. Be careful not to cut the pads themselves.
- Around the Paw: Comb the hair down over the paw and trim in a neat circle around the paw, following the line of the pad. This creates a clean, rounded "teddy bear" paw look.
- Dewclaws: If your Yorkie has dewclaws, remember to trim the hair around them as well.
Finishing Touches and Nail/Ear Care
You're almost done! These final steps ensure your Yorkie is comfortable and looking their best.
- Check for Evenness: After clipping and trimming, step back and examine your Yorkie from all angles. Look for any uneven spots or stray hairs you might have missed. Use your thinning shears to blend any noticeable lines created by the clippers, especially where the body meets the legs.
- Nail Trim: With the main cut complete, it's a good time to trim your Yorkie's nails if you haven't already. Be cautious not to cut into the quick. Always have styptic powder on hand just in case.
- Ear Cleaning: Finish up by cleaning your Yorkie's ears with a vet-approved ear cleaner and cotton balls. This helps remove any hair clippings that might have fallen in and keeps their ears healthy.
- Reward! Your Yorkie has been a trooper! Shower them with praise and their favorite treats. Using high-value treats from brands like Ollie (which often have wholesome, nutritious options) can make this a very positive experience, associating grooming with good things.
Tips for a Stress-Free Grooming Experience
Grooming, especially a full puppy cut at home, can be a big undertaking for both you and your Yorkie. Making it as positive and stress-free as possible is key to ensuring future grooming sessions go smoothly. Patience and positive reinforcement are your best friends here.
Positive Reinforcement and Patience
Yorkies are sensitive little souls, and a buzzing clipper or unfamiliar sensations can be alarming. Your attitude will directly influence their comfort level.
- Start Early and Short: If you have a puppy, start grooming exposure early, even if it's just a quick brush or touching their paws. For any age, keep initial grooming sessions very short, especially when introducing new tools. Five minutes of positive interaction is far better than 30 minutes of struggle.
- Introduce Tools Gradually: Let your Yorkie sniff and explore the clippers (turned off) before you turn them on. Then, turn them on briefly and let your dog hear the sound from a distance, offering a treat. Gradually bring the vibrating clippers closer, praising and rewarding them for calm behavior.
- Treats, Treats, Treats: Positive reinforcement is crucial. Every time your Yorkie tolerates a step – a brush stroke, the sound of the clippers, or a trim – give them a small, high-value treat. This builds a positive association with grooming. Many pet parents find that even just sitting calmly on the grooming table deserves a reward. You can even strategically place a lick mat with peanut butter to distract them during clipping. Ollie, while primarily a fresh food brand, offers a variety of healthy and tasty treats that can be excellent for this purpose.
- Stay Calm and Confident: Dogs pick up on our emotions. If you're nervous or frustrated, your Yorkie will sense it and likely become nervous themselves. Take deep breaths, speak in a calm, soothing voice, and project confidence, even if you don't quite feel it yet.
- Take Breaks: If your Yorkie starts to get agitated or stressed, don't push it. Take a short break. Let them walk around, get a drink of water, or have a cuddle. Then, resume the grooming when both of you are feeling more relaxed.
Handling Common Challenges
Even with the best intentions, you might encounter some bumps in the road. Knowing how to troubleshoot these common issues can save a lot of frustration.
- Squirming and Wiggling: This is perhaps the most common challenge.
- Secure Position: Ensure your Yorkie is on a non-slip surface or a grooming table with a grooming arm and loop, which can help keep them safely in place without restricting them too much. Never tie them down; the loop is just to gently keep them from jumping off.
- Short Sessions: Break the groom into multiple shorter sessions if needed. You don't have to do it all at once. Perhaps one day is for the body, another for the face and paws.
- Enlist Help: If possible, have another person gently hold or distract your Yorkie with treats while you groom.
- Fear of Clippers: Some Yorkies are terrified of the sound or vibration.
- Desensitization: As mentioned, gradual introduction with treats is key.
- Quieter Clippers: Invest in high-quality, quiet clippers designed for sensitive pets. You can find options on Amazon.
- Scissor Work: If clippers are truly a non-starter for certain areas, you might need to rely more on careful scissor work, particularly for the legs and body. However, this is more time-consuming and requires greater skill to achieve an even look.
- Accidental Nicks or Cuts: Even experienced groomers can have accidents, especially with a squirming dog.
- Be Prepared: Always have styptic powder or a styptic pencil readily available. Apply it directly to any small nicks to stop bleeding.
- Prevention: Always use sharp blades (dull blades pull hair and increase risk of injury). Always keep the skin taut. Work slowly and methodically. If you're nervous about areas like Yorkie Eye Problems Explained, consider leaving detailed face trims to a professional, at least initially.
- Uneven Cut: It happens to the best of us when starting out.
- Don't Panic: It's just hair, it will grow back!
- Blending Shears: Use thinning shears to soften any harsh lines or blend uneven areas. They remove less hair at a time, making it harder to make a mistake.
- Practice Makes Perfect: The more you groom, the better you'll become. Each cut is a learning experience. You might even find some helpful online tutorials for specific techniques like how to create a perfect How to Give a Yorkie a Teddy Bear Cut or How to Give a Yorkie a Show Cut.
Remember, the goal is not perfection on your first try, but a positive, safe experience for your Yorkie and a comfortable, healthy coat. Your pup will appreciate the care, and you’ll love their fresh, adorable puppy cut!
Puppy Cut Blade Length Guide
To help you visualize and plan your Yorkie's puppy cut, here's a general guide for blade lengths. Remember these are starting points; you can adjust slightly based on your Yorkie's coat thickness and your desired final look. Always opt for a longer blade if you're unsure, as you can always go shorter.
| Body Area | Recommended Clipper Blade (Standard #10 blade is 1/16 inch) | Approximate Hair Length Left | Notes |
|---|---|---|---|
| Body (Back, Sides) | #7F (full tooth blade) or #5F | 1/8 to 1/4 inch | Gives a soft, fluffy puppy look. Clip with the direction of hair growth. |
| Body (Longer Look) | #10 blade with 1/2-inch or 3/4-inch comb guard | 1/2 to 3/4 inch | For a fluffier, slightly longer puppy style. Ensure comb guard is securely attached. |
| Chest and Neck | Same as body | 1/8 to 3/4 inch | Blend smoothly into body length. Be cautious around the throat. |
| Belly | #10 or #7F | 1/16 to 1/8 inch | Slightly shorter for hygiene. Stretch skin taut to avoid nicks. |
| Sanitary Area | #10, #30, or #40 | Very short (1/16 inch or less) | For cleanliness. Use extreme caution here; small, flat strokes. |
| Legs | Same as body or slightly longer with comb guard | 1/8 to 3/4 inch | Clip down the leg, then use scissors to neaten and round the shape. |
| Paws | Scissors (blunt-nosed) and careful trimming | Very short (between pads) | Trim hair between pads and neaten around the paw circumference. |
| Face (Muzzle, Chin) | Scissors (straight/thinning/blunt-nosed) | Varies | Trim to create a rounded, soft look. Use thinning shears for blending. |
| Around Eyes | Scissors (blunt-nosed safety shears) | Varies | Carefully trim hair away from eyes to prevent irritation. |
| Ear Tips | Scissors or #10 blade | Very short | For a clean, upright ear look, if desired. |
Disclaimer
The information provided in this guide is for general educational and informational purposes only, and does not constitute veterinary or professional grooming advice. Always consult with a qualified veterinarian or professional groomer for any specific concerns regarding your Yorkshire Terrier's health or grooming needs. Improper grooming techniques can lead to injury.