How to Give a Yorkie a Schnauzer Cut
Giving your adorable Yorkshire Terrier a Schnauzer cut might sound a little unconventional at first, especially when you picture a tiny Yorkie sporting the distinctive look of a much larger breed. But trust me, as someone who’s spent years grooming these spirited little dogs, it’s a fantastic, practical, and incredibly charming style that many Yorkie parents swear by. This guide is all about demystifying the process, helping you tackle this fun cut at home, and ensuring your furry friend looks their absolute best without a costly trip to the groomer every few weeks.
Understanding the Schnauzer Cut for Your Yorkie
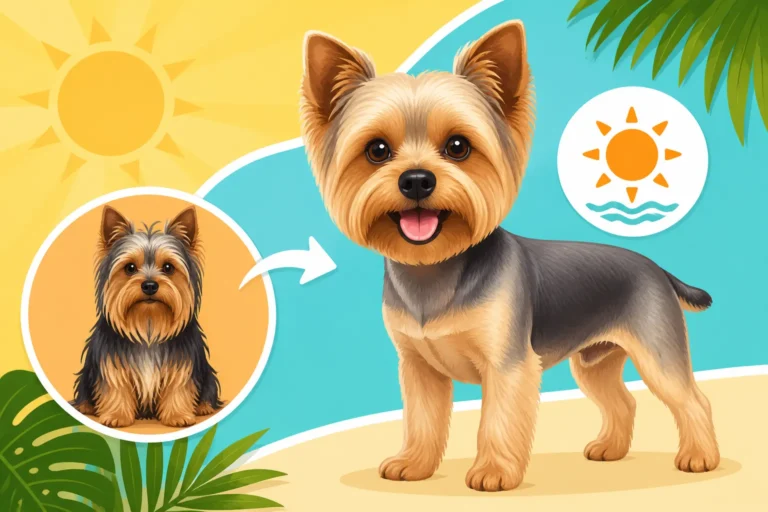
The idea of blending two distinct breeds' looks can feel a bit daunting, but the Schnauzer cut on a Yorkie is less about making them look like a Schnauzer and more about adopting the practical, stylish elements of the cut that work wonders on a Yorkie’s fine, silky coat. It’s a purposeful style that keeps things neat and manageable while highlighting some of their cutest features.
What Exactly is a Schnauzer Cut?
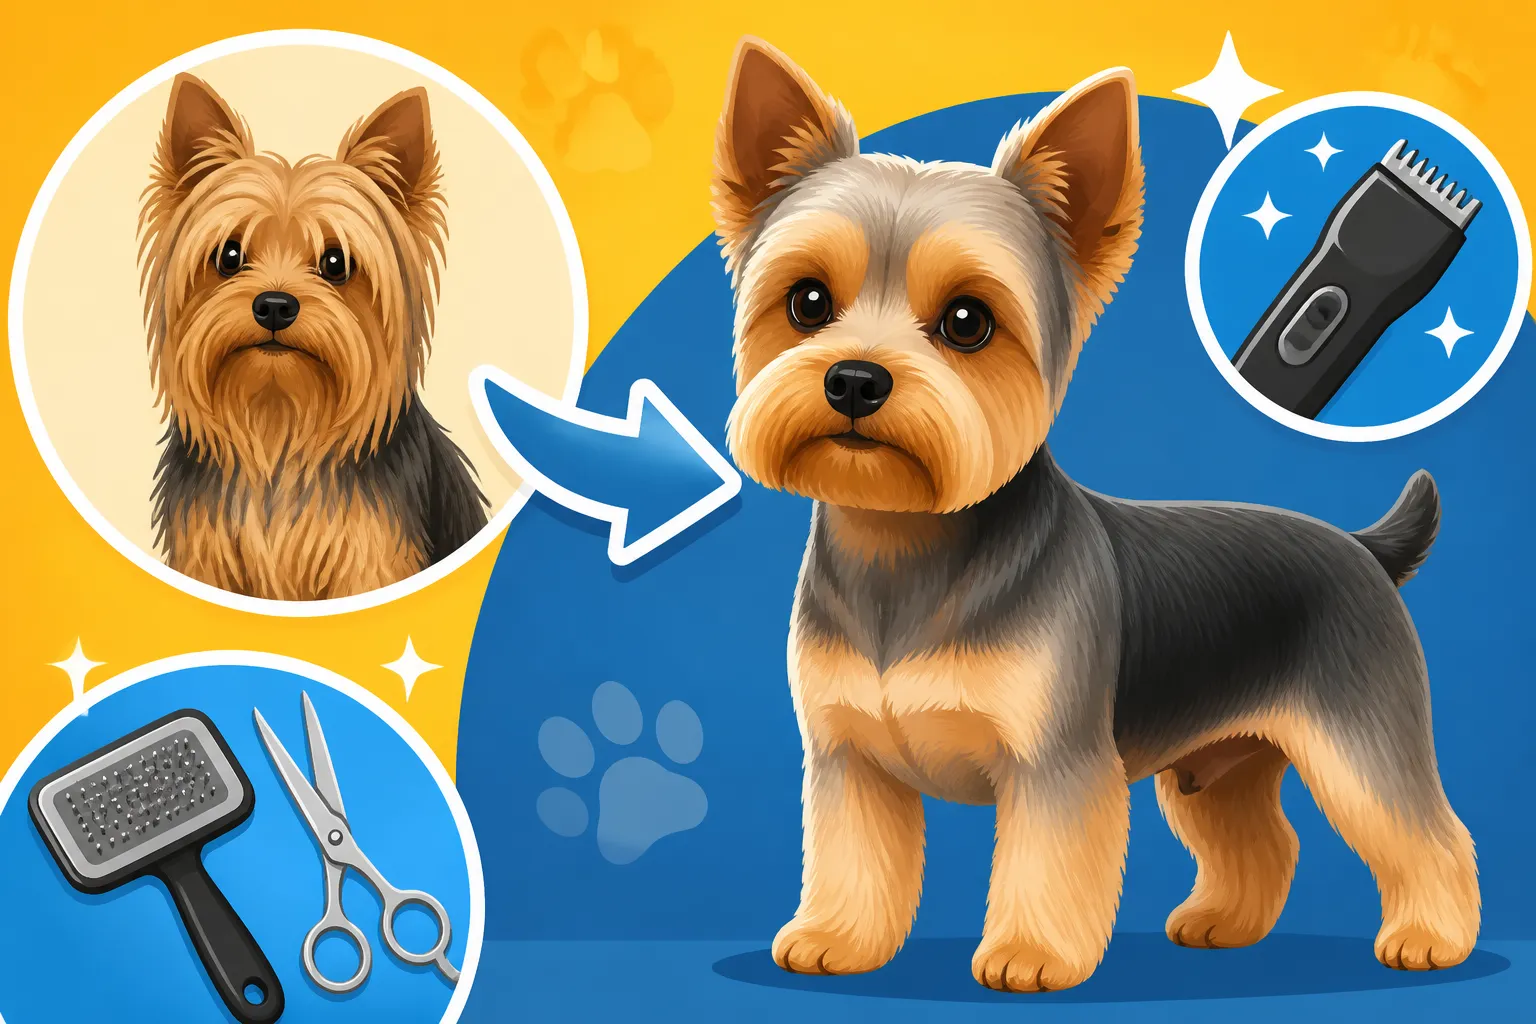
Traditionally, a Schnauzer cut features a short, clipped body, often with a distinct 'skirt' of longer hair around the belly and longer hair on the legs. The hallmark of the Schnauzer look, however, is the prominent, well-shaped eyebrows and a full, rectangular beard. When we talk about adapting this for a Yorkie, we're essentially taking these core principles and applying them to a smaller scale and a different coat type.
For a Yorkshire Terrier, a Schnauzer cut typically means:
- A short body clip: This is usually done with clippers, keeping the hair quite short (think 1/4 to 1/2 inch) over the back and sides. This makes for incredibly easy maintenance, especially if your Yorkie loves to roll in everything.
- Longer, shaped leg hair: Unlike a uniform short clip, the hair on the legs is left longer, often scissored to create a cylindrical or slightly flared appearance, providing a cute contrast to the clipped body.
- Distinct facial hair: This is where the Schnauzer influence really shines. You'll aim for well-defined, albeit scaled-down, eyebrows that have that characteristic arch, and a neatly trimmed beard that’s left longer than the body hair. This really brings out their expressive eyes and adds a touch of sophistication.
- A neat tail: The tail can be left longer or clipped short to match the body, depending on your preference.
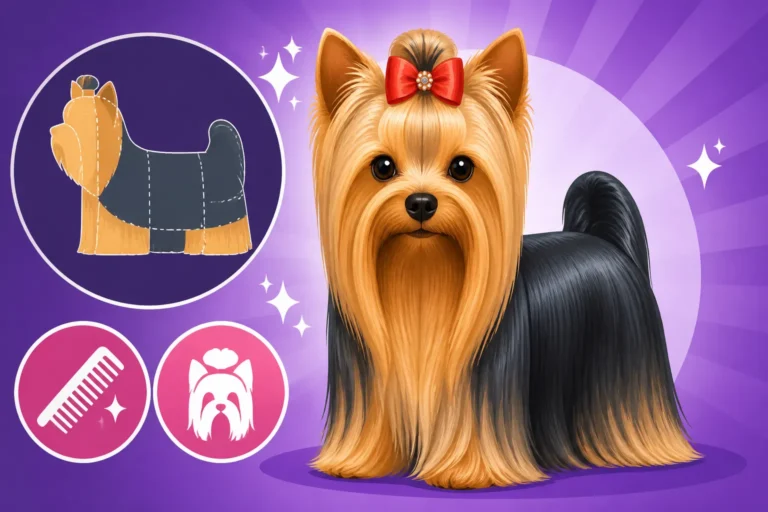
Many Yorkie owners, myself included, find the standard long, flowing show coat to be absolutely beautiful but incredibly high-maintenance. It tangles, it mats, it picks up everything. This is where the modified Schnauzer cut comes in as a fantastic compromise – it’s stylish without the daily battle against knots.
Benefits and Considerations for the Schnauzer Cut
Before you dive in, it’s a good idea to weigh the pros and cons of this particular style for your little companion. It's a fantastic option for many, but it's not a one-size-fits-all solution.
The Advantages of the Schnauzer Cut for Yorkies
One of the biggest perks of this cut is undeniably the reduced maintenance. Yorkies have hair, not fur, which means it grows continuously and is prone to matting. A short body clip drastically cuts down on brushing time and the risk of painful mats, especially in areas like behind the ears, under the armpits, and around the sanitary regions. If you've ever dealt with severe matting, you know how stressful and uncomfortable it can be for your dog, often requiring extensive dematting or even shaving by a professional. This style helps prevent that.
Another significant benefit is comfort, especially in warmer climates. A shorter body allows for better airflow, keeping your Yorkie cooler during those hot summer months or if they’re particularly active. You'll still need to ensure they have access to shade and water, of course, but a lighter coat certainly helps.
Beyond practicality, the Schnauzer cut offers a distinctive and adorable aesthetic. It gives your Yorkie a unique, spunky look that really highlights their personality. The longer hair on the legs and face adds character without being cumbersome. Plus, it’s a great way to differentiate your Yorkie from the many others sporting the typical "puppy cut." For more on keeping your Yorkie looking sharp, check out our Yorkshire Terrier Grooming Guide.
Points to Consider Before You Clip
While the benefits are many, there are a few things to keep in mind. The primary consideration is that while the body is low maintenance, the facial hair and leg furnishings still require regular attention. The beard and eyebrows, if left long, will need daily combing and cleaning to prevent food, dirt, and moisture from causing tangles or skin irritation. If your Yorkie has tear stains, the longer facial hair might make them more prominent. You can find tips on dealing with those in Yorkie Eye Problems Explained.
Another factor is your own grooming skill level. Achieving the distinct lines and shapes of the Schnauzer cut, particularly the eyebrows and beard, requires a steady hand and some practice with scissors. If you’re completely new to grooming, you might want to start with a simpler all-over puppy cut before attempting the more detailed work on the face and legs. Don't be discouraged, though; everyone starts somewhere! Patience is key.
Finally, consider your Yorkie's personality. Some Yorkies are naturally calm and tolerant of grooming, while others are little wiggle worms. If your dog is particularly anxious or has a low tolerance for being handled, breaking the grooming into shorter sessions might be necessary, and you may want to focus on making it a positive experience with lots of treats and praise. For general advice on preparing your home and your dog, you might find How to Prepare Your Home for a Yorkie helpful.
Essential Tools and Supplies for the Schnauzer Cut
Having the right tools is half the battle when it comes to grooming, especially when aiming for a specific style like the Schnauzer cut. Trying to make do with subpar equipment will only lead to frustration for both you and your Yorkie. Investing in quality tools makes the process smoother, safer, and more enjoyable.
Gathering Your Grooming Arsenal
Before you even think about plugging in clippers, make sure you have everything laid out. This prevents you from having to search for tools mid-grooming session, which can unsettle your dog.
Here's a breakdown of the essentials:
- Professional Dog Clippers: This is your most important investment. Look for quiet, powerful clippers designed for fine dog hair. Brands like Andis and Wahl are highly regarded by professional groomers. Cordless options offer more maneuverability.
- Clipper Blades: You’ll need a few. For the body, a #7F blade will give a nice, short, smooth finish, leaving about 1/8 inch of hair. For an even shorter cut, like in summer or if your Yorkie is prone to mats, a #10 blade is ideal, leaving 1/16 inch. Some prefer a #5F for a slightly longer, softer body. Having a few options allows for versatility.
- Grooming Shears (Scissors): You'll need a variety for precision work.
- Straight Shears: For general trimming, shaping the beard, and evening out leg hair. Look for a comfortable size, around 6-7 inches.
- Thinning Shears: Crucial for blending clipped areas into longer areas (like the legs and face) and softening harsh lines. These have one serrated blade and one straight blade.
- Curved Shears: Excellent for shaping rounded areas, particularly the top of the head or curving the eyebrow line.
- Steel Comb: A good quality, fine-toothed steel comb is indispensable for checking for tangles, fluffing hair, and ensuring even cuts.
- Slicker Brush: Used for general brushing to remove loose hair and stimulate the coat, especially on the longer leg and facial hair.
- Nail Clippers or Grinder: Keeping nails short is important for your dog's comfort and prevents them from getting caught or growing into the paw pads.
- Ear Cleaner and Cotton Balls/Pads: Yorkies can be prone to ear wax buildup, so cleaning them regularly is part of good hygiene.
- Dog-Specific Shampoo and Conditioner: Choose products designed for sensitive skin or fine hair to keep their coat healthy and manageable. Brands like Earthbath or BioSilk often offer great options. Many of these supplies can be found readily on platforms like Amazon or specialized pet stores like Chewy.
Preparing Your Yorkie for the Grooming Session
A successful groom starts with a well-prepared dog. Rushing this step can lead to a stressed-out Yorkie and a much harder job for you.
The Pre-Grooming Bath and Dry
Always start with a clean, dry coat. Dirt and oils can dull clipper blades and make it impossible to get an even cut.
- Bathe thoroughly: Use a good quality dog shampoo. Lather well, paying attention to the longer areas like the legs and face. Rinse completely, ensuring no residue is left behind, as this can cause skin irritation. For more bathing tips, see How Often to Bathe a Yorkshire Terrier.
- Condition: Follow with a dog-specific conditioner. This helps to soften the hair, making it easier to comb and less prone to static during clipping.
- Towel Dry: Gently squeeze out excess water with a towel. Avoid vigorous rubbing, which can cause tangles.
- Blow Dry Completely: This is crucial. Your Yorkie's coat must be bone dry and thoroughly brushed out before clipping. Use a dog-specific forced air dryer on a low, cool setting if you have one, or a human hairdryer on a cool setting. Brush as you dry to straighten the hair and ensure no tangles are hiding.
Thorough Brushing and Detangling
Once dry, brush your Yorkie's entire coat with a slicker brush, then follow up with a steel comb to ensure every knot and tangle is removed. Pay extra attention to the areas where mats commonly form, such as behind the ears, under the legs, and around the belly. Clippers can’t go through mats, and trying to force them will cause pain and could injure your dog. If you encounter a mat, try to gently work it out with your fingers and a comb, or use a dematting spray. If it’s too severe, it may need to be carefully scissored out (cut under the mat, close to the skin, but always with extreme caution).
Creating a Calm Environment
Your Yorkie will pick up on your stress, so try to be calm and confident. Choose a quiet time and place where you won't be interrupted. A non-slip surface on a table or counter at a comfortable working height is ideal. Have plenty of small, high-value treats on hand. Positive reinforcement is key! Talk to your Yorkie in a soothing voice, offer praise, and give breaks if they seem stressed. Some groomers even use calming chews or a Thundershirt for anxious dogs. Remember, patience is your best friend here.
Step-by-Step Guide to Giving Your Yorkie a Schnauzer Cut
Alright, it’s time to get hands-on! Remember, the goal isn't perfection on your first try, but a safe, neat, and comfortable cut for your Yorkie. Take your time, be patient, and always prioritize your dog's safety and well-being.
Body Clipping for the Signature Look
This is where you'll use your clippers to create the short, easy-care body of the Schnauzer cut.
- Choose Your Blade: For a typical Schnauzer look on a Yorkie, a #7F or #10 blade is common for the body. A #7F leaves slightly more hair, giving a softer look, while a #10 provides a very clean, short finish. If your Yorkie's coat is very fine or you want a slightly longer body, a #5F blade could also work.
- Start with the Back: Turn on your clippers before touching your dog so they can get used to the sound. Begin clipping from the back of the neck, moving down towards the tail. Always clip with the grain of the hair for a smoother finish and to avoid clipper marks. Hold the clipper flat against the skin and use long, even strokes.
- Move to the Sides: Continue clipping down the sides of their body, from their back towards their belly. Be extra careful around delicate areas like the flanks and where the leg meets the body.
- The Chest and Underside: Gently lift your Yorkie’s front legs to access their chest, and carefully clip the hair on the chest and underbelly. Be extremely cautious around nipples and other sensitive skin. You might also want to do a sanitary trim in this stage, shortening the hair around their private areas to about 1/16 inch with a #10 blade or carefully with small, blunt-nosed scissors. This helps keep them clean after potty breaks.
- Check for Evenness: Step back and look at your Yorkie from all angles. Run your hands over their body to feel for any missed spots or uneven patches. Go over any areas that need blending with smooth, overlapping strokes.
Remember that Yorkies have thin skin, so always keep the clipper cool by periodically cleaning hair out of the blade and applying a cooling spray. Never use a hot blade on your dog. If the blade feels hot to the touch, let it cool down or switch to a fresh, cool blade.
Shaping the Legs, Eyebrows, and Beard
This is the artful part of the Schnauzer cut, where you’ll use your scissors to create those distinctive features. This requires patience and a steady hand.
- The Legs: The hair on the legs is typically left longer than the body.
- Front Legs: Comb the hair down and then use straight shears to trim around the paw, creating a neat, rounded look. Then, holding the hair straight out, use your straight shears to trim the leg hair, creating a clean, column-like shape. You want the legs to look like sturdy little pillars. Use thinning shears to blend the longer leg hair into the shorter body hair at the top of the leg.
- Back Legs: Similarly, comb the hair on the hind legs down. Trim around the paw. Then, shape the hair on the back legs, ensuring it’s uniform with the front. You’ll typically leave the hock (ankle) area a bit longer to flow into the paw. Use thinning shears again for blending.
- The Eyebrows: This is key to the Schnauzer look.
- Comb Forward: Comb the hair over your Yorkie’s eyes straight forward, towards their nose.
- Identify the Arch: You want to create an arch that starts above the inner corner of the eye and extends slightly past the outer corner.
- Trim with Care: Using small, blunt-nosed straight shears (or even curved shears for a softer arch), carefully trim the hair, making sure to avoid poking their eyes. You’ll leave a small amount of hair, perhaps 1/2 to 1 inch long, tapering it to a point or a slight curve. The goal is to give them that alert, expressive eyebrow without obscuring their vision. Again, less is more for your first attempt.
- The Beard: The beard gives your Yorkie that charming, wise look.
- Comb Down: Comb all the hair on their chin and muzzle straight down.
- Define the Shape: You want to create a somewhat rectangular shape, wider at the bottom. Start by trimming the hair that extends too far below their chin.
- Trim and Blend: Use your straight shears to trim the sides of the beard, creating a neat, defined line that extends from below their eyes downwards. The length is a matter of preference, but typically it’s left longer than the body hair, perhaps 1-3 inches. Use your thinning shears to soften any harsh lines and blend the beard into the cheek hair.
- Mouth Area: Be careful when trimming around the mouth. Ensure the hair isn't getting caught in their mouth when they eat or drink.
It helps to regularly step back and look at your Yorkie from different angles to ensure symmetry and balance. Don't be afraid to make small adjustments.
Finishing Touches and Hygiene
Once the main clipping and scissoring are done, it's time for the final details that complete the groom and ensure your Yorkie is comfortable and healthy.
- Paws and Pads: Use small, blunt-nosed scissors or a #10 clipper blade to carefully trim the hair between your Yorkie’s paw pads. Excess hair here can collect dirt, harbor debris, and make it difficult for them to grip surfaces, potentially causing slips. Also, trim around the outline of the paw for a clean look.
- Ear Cleaning: Gently clean your Yorkie’s ears with a dog-specific ear cleaner and a cotton ball or pad. Never use cotton swabs inside the ear canal. Just clean the visible parts of the ear. If you notice any redness, discharge, or foul odor, consult your vet, as this could be a sign of an Yorkie Ear Infections Prevention.
- Nail Trimming: Use a good quality nail clipper or grinder to trim their nails. Be careful not to cut the quick (the pink part inside the nail, containing blood vessels and nerves), as this is painful and will bleed. If you’re unsure, just trim the very tips. Many owners prefer a Dremel-style grinder for a smoother finish and less risk of cutting too deep. Check out our guide on How to Trim a Yorkie's Nails for more detailed instructions.
- Final Brush and Inspection: Give your Yorkie one last thorough brushing with a slicker brush and comb to remove any loose hairs. Then, run your hands over their entire body, checking for any missed spots, sharp edges, or areas that need further blending. A quick wipe down with a damp cloth can remove any fine hairs that have settled on their coat.
- Reward Time! Your Yorkie has been a superstar! Finish the session with plenty of praise, cuddles, and their favorite treat. This helps them associate grooming with positive experiences.
Maintaining the Schnauzer Cut and Post-Grooming Care
The beauty of the Schnauzer cut on a Yorkie is its manageability, but "manageable" doesn't mean "no maintenance." Regular upkeep is essential to keep your Yorkie looking sharp and feeling comfortable.
Regular Maintenance Schedule
To keep that distinct Schnauzer look, you'll need to establish a consistent grooming routine.
- Body Clipping: The short body hair will typically need to be re-clipped every 4 to 6 weeks. This timeframe can vary depending on how fast your Yorkie's hair grows and how short you prefer the body to be. If you let it go too long, the contrast with the leg and facial hair will diminish, and the overall shape will be lost.
- Facial Hair and Legs: The longer hair on the beard, eyebrows, and legs needs more frequent attention. Daily or every-other-day brushing and combing is crucial to prevent tangles and mats, especially after meals or outdoor adventures. If you notice food getting stuck in their beard, a quick rinse with warm water and a gentle comb-through can save you a lot of trouble later.
- Paws and Sanitary Areas: These areas grow quickly and should be checked and trimmed every 2-3 weeks. Keeping the hair short around the paw pads and sanitary area prevents discomfort and keeps your Yorkie cleaner.
- Nails: Nails should be trimmed every 2-4 weeks, or as needed, to prevent them from getting too long. Long nails can cause discomfort, affect their gait, and even lead to paw problems.
- Ears: Check and clean ears weekly to prevent buildup and catch any potential issues early.
A regular schedule will not only keep your Yorkie looking good but will also make each grooming session easier as they become accustomed to the routine. Consistency is truly key for How to Keep a Yorkshire Terrier Healthy.
Dealing with Common Grooming Challenges
Even with the best intentions and tools, you might encounter some bumps along the grooming road.
Handling a Squirmy Yorkie
Yorkies are known for their lively personalities, and sometimes that translates into being a bit squirmy during grooming.
- Short Sessions: Break down grooming into shorter, more manageable sessions. If your Yorkie starts to get agitated, take a break and try again later.
- Positive Reinforcement: Lavish them with praise and treats throughout the process. Make it a fun, rewarding experience.
- Grooming Sling/Harness: For truly difficult cases, a grooming sling that elevates your dog (available on sites like Chewy or Amazon) can keep them safely restrained and make it easier to reach all areas. Always supervise closely.
- Start Young: If you have a puppy, start grooming training early. Gentle handling and short, positive sessions will build a good foundation. Read our Yorkshire Terrier Puppy Health Guide for more tips on starting good habits.
Preventing Clipper Burns or Nicks
Clipper burns happen when the blade gets too hot, causing skin irritation. Nicks occur if you're not careful around delicate skin or if your dog moves unexpectedly.
- Cool Blades: Always check your clipper blades frequently. If they feel hot, stop immediately, clean them, and use a cooling spray or switch to a cool blade.
- Taut Skin: Always hold the skin taut with your free hand when clipping. This helps prevent the skin from folding into the blade and reduces the risk of nicks.
- Be Gentle Around Joints and Nipples: These areas are particularly prone to injury. Use extreme caution, and if necessary, use scissors for small, delicate patches.
- Sharp Blades: Dull blades pull hair and can cause irritation. Ensure your blades are always sharp.
Table: Common Clipper Blades for Yorkies
| Blade Size | Hair Length Left | Best Use | Considerations |
|---|---|---|---|
| #10 | 1/16 inch (1.5mm) | Very short body, sanitary, paw pads | Can be quite revealing, good for hot weather/mats |
| #7F | 1/8 inch (3.2mm) | Short body, common for many cuts, neat finish | Good balance of shortness and protection |
| #5F | 1/4 inch (6.3mm) | Slightly longer body, softer look | Less definition than #7F, more brushing than #10 |
| #4F | 3/8 inch (9.5mm) | Longer body, often for fluffier styles | Requires more frequent brushing to prevent matting |
| Attachment Combs | Varies | For leaving longer body hair (e.g., 1/2-1 inch) | Use on clean, tangle-free hair; less precise than blades |
Note: 'F' blades are 'finish' blades, designed to leave a smooth, finished look without needing to go over with another blade.
Patience and Positive Reinforcement
This can't be stressed enough. Grooming is a bond-building activity. If you approach it with patience, calm energy, and positive reinforcement, your Yorkie will learn to tolerate, and perhaps even enjoy, their grooming sessions. If you get frustrated, take a break. It’s better to have an unfinished groom than a traumatized dog. Over time, your skills will improve, and your Yorkie will become more cooperative.
Giving your Yorkie a Schnauzer cut at home is a rewarding experience that not only saves money but also strengthens your bond with your furry friend. With the right tools, a clear plan, and plenty of patience, you'll be giving professional-looking grooms in no time.
Disclaimer
This article is for general informational purposes only and does not constitute professional advice. Laws, prices and regulations vary by location and change over time. Consult a qualified professional for guidance on your specific situation.